Canning Easy 3-Ingredient Jam: A Simple Homemade Fruit Preserve Recipe
There’s something deeply satisfying about opening a jar of homemade jam in the middle of winter and tasting the sunshine of summer. And the surprising part is how little it takes to make it. This easy preserve uses just three ingredients: ripe fruit, sugar, and lemon juice. There’s no boxed pectin, no special equipment beyond basic canning supplies, and no complicated steps.
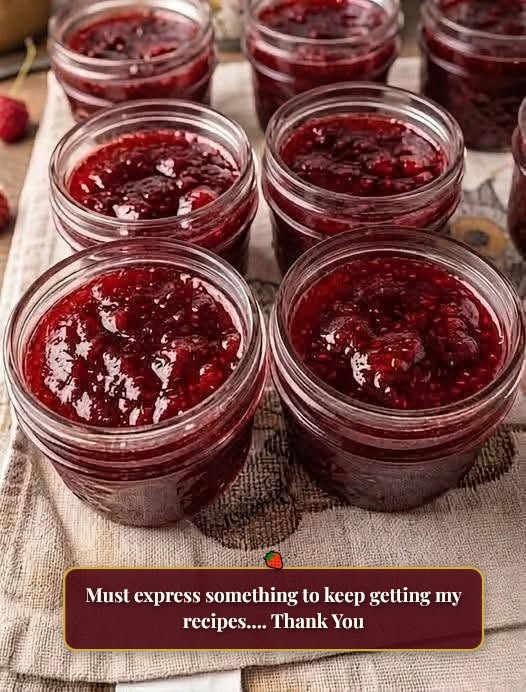
The method is old-fashioned and reliable: you cook the fruit with sugar until it thickens and sets naturally, then seal it in jars using a boiling-water-bath canner. The result is a bright, fruity, perfectly spreadable jam that tastes like real fruit, not candy. This guide walks you through every step, plus the safety tips that make home canning worry-free.
Why You’ll Love This Jam
- Only 3 ingredients. Fruit, sugar, and lemon juice. That’s it.
- No added pectin. Strawberries and lemon juice provide enough natural pectin for a soft, spreadable set when cooked properly.
- Real fruit flavor. Short ingredient list, big taste.
- Shelf-stable. Properly canned jars keep in the pantry for up to a year.
- Perfect for gifting. Jars with a handwritten label make thoughtful homemade gifts.
- Beginner-friendly. If you’ve never canned before, this is a great first recipe.
Why Each Ingredient Matters
Fruit. Ripe, flavorful berries make the best jam. A mix of fully ripe and slightly underripe fruit gives the best set, since underripe fruit contains more natural pectin.
Sugar. Sugar does more than sweeten. It helps the jam gel, keeps the color bright, and gives the preserve its texture. Don’t reduce the sugar in a traditional recipe like this one, or the jam may not set properly.
Lemon juice. Lemon adds acidity and natural pectin, brightens the flavor, and helps the jam gel. Bottled lemon juice has a consistent acidity level, which is why many canning guides recommend it over fresh.
Equipment You’ll Need
- A large, wide, heavy-bottomed pot or Dutch oven (jam bubbles up, so use a pot at least 3 to 4 times the volume of your fruit)
- A boiling-water-bath canner with a rack (or a large stockpot with a rack)
- 8 half-pint (8 oz) canning jars with new lids and screw bands
- A jar lifter
- A canning funnel
- A ladle
- A clean towel
- A potato masher
- A bubble remover or a thin plastic or wooden spatula
- A small plate placed in the freezer (for testing the set)
- A candy thermometer (optional but helpful)
Ingredients
- 8 cups crushed strawberries (about 4 to 5 pounds of whole, hulled berries)
- 6 cups granulated sugar
- 2 tablespoons bottled lemon juice
Yield: about 7 to 8 half-pint jars
Instructions
1. Prepare your jars and canner
Wash jars, lids, and bands in hot, soapy water and rinse well. Place the jars on a rack in your canner, cover with water, and bring to a simmer. Keep them hot until you’re ready to fill them. Because this recipe has a short processing time, boil the jars for 10 minutes to sterilize them first. Keep the lids in hot (not boiling) water. Fill the canner with enough water to cover filled jars by at least 1 inch.
2. Prepare the fruit
Wash the strawberries, remove the stems and hulls, and crush them one layer at a time with a potato masher. Measure exactly 8 cups of crushed fruit.
3. Combine
Place the crushed strawberries, sugar, and lemon juice in a large, heavy-bottomed pot. Stir until the sugar is evenly mixed. You can let the mixture stand for 30 minutes to draw out juices, which helps the sugar dissolve.
4. Cook the jam
Bring the mixture to a boil over medium-high heat, stirring constantly to dissolve the sugar and prevent scorching. Continue to cook at a rolling boil, stirring often, until the jam thickens and reaches the gel stage. This usually takes 20 to 30 minutes, depending on your pot and the juiciness of your berries.
5. Test the set
The jam is ready when it reaches 220°F (104°C) at sea level on a candy thermometer, or when it passes the plate test:
- Remove the pot from the heat.
- Spoon a little jam onto a chilled plate from the freezer.
- Wait 30 seconds, then push the jam with your finger. If it wrinkles and holds a line, it’s done. If it runs back together, cook a few minutes more and test again.
6. Skim and fill
Skim off any foam with a spoon. Remove one hot jar at a time from the canner. Use a funnel to ladle hot jam into the jar, leaving ¼ inch of headspace.
7. Remove bubbles and wipe rims
Slide a thin spatula around the inside of each jar to release air bubbles. Wipe the rims with a clean, damp cloth so they are completely clean.
8. Seal the jars
Place a hot lid on each jar and screw on the band until just fingertip tight. Don’t overtighten.
9. Process in the water bath
Lower the jars into the canner, making sure the water covers them by at least 1 inch. Bring to a full rolling boil, then start the timer:
- 0 to 1,000 feet above sea level: process for 5 minutes
- At higher altitudes, increase the time according to a tested altitude chart from a reliable source such as the National Center for Home Food Preservation.
10. Rest and cool
When the time is up, turn off the heat, remove the canner lid, and wait 5 minutes. Then remove the jars with a jar lifter and place them on a towel, spaced apart. Don’t tilt or tighten them.
11. Check the seals
Let the jars cool undisturbed for 12 to 24 hours. You may hear a “ping” as the lids seal. Afterward, press the center of each lid. If it doesn’t flex, it’s sealed. Remove the bands, wipe the jars, label them with the date, and store them.
Time and Yield
- Prep time: 30 minutes
- Cook time: 20 to 30 minutes
- Processing time: 5 minutes (plus heating the canner)
- Cooling time: 12 to 24 hours
- Yield: 7 to 8 half-pint jars
How to Tell If Your Jam Has Set
Jam thickens a lot as it cools, so it can look runnier in the pot than the final product. Trust the thermometer (220°F) or the plate test. Also, jam can take up to 48 hours to fully set in the jar, so don’t panic if it looks loose at first.
Tips for the Best Homemade Jam
- Use ripe, flavorful fruit. Jam can’t taste better than the berries you start with.
- Don’t double the recipe. Larger batches take longer to reach the gel point and can end up overcooked or runny. Make two separate batches instead.
- Don’t reduce the sugar. In traditional jam, less sugar can lead to a softer set and shorter shelf life. For lower-sugar jam, use pectin made for that purpose and follow its package directions.
- Stir constantly near the end. Thick jam scorches easily.
- Use a wide pot. More surface area helps the jam cook faster and set better.
- Skim the foam. It doesn’t affect safety, but removing it gives a clearer jam.
- Use new lids every time. Bands can be reused, but flat lids are designed for single use.
- Keep everything hot. Hot jam in hot jars helps prevent breakage and supports a good seal.
Food Safety Rules for Canning Jam
- Always use a boiling-water-bath canner. Don’t can jam in the oven, in the dishwasher, or by simply flipping jars upside down.
- Follow tested recipes and processing times. Don’t improvise major changes in sugar, acid, or fruit amounts.
- Don’t use paraffin wax seals. They are no longer recommended.
- Check every seal. If a lid flexes or pops, the jar isn’t sealed. Refrigerate it and use it within a few weeks, or reprocess it within 24 hours.
- Discard jars with mold, bulging lids, fermentation bubbles, or an off smell. Don’t taste jam you suspect has spoiled.
- Refrigerate after opening. Opened jam keeps for about 3 weeks.
Troubleshooting Common Jam Problems
My jam didn’t set.
It may be undercooked, have too little sugar or acid, or have been made in too large a batch. Give it 24 to 48 hours to set first. If it’s still runny, you can recook it with a little extra lemon juice, or use it as a delicious ice cream or pancake syrup.
My jam is too thick or stiff.
It was overcooked. Stir in a little water or juice and gently reheat, or use it as a filling for pastries.
The fruit floated to the top.
This is common with large pieces of fruit. Crush the fruit well and let the jam cool slightly in the pot for 5 minutes, stirring before filling jars.
My jam is cloudy.
Foam wasn’t skimmed, or the fruit was overly crushed or underripe. It’s safe to eat.
The color faded or darkened.
Storing jars in light or warm places can cause color loss. Store jars in a cool, dark cupboard.
My jam crystallized.
Sugar crystals can form if the jam was boiled too long or stirred after the sugar dissolved. It’s safe to eat.
My jam has a layer of liquid on top.
Slight separation can happen. Stir it before serving.
Easy Flavor Variations
- Vanilla strawberry jam: Add 1 teaspoon of vanilla extract after cooking.
- Strawberry-lemon jam: Add 1 teaspoon of lemon zest at the start of cooking.
- Balsamic strawberry jam: Stir in 1 teaspoon of balsamic vinegar right before filling the jars (a small amount only).
- Mixed berry jam: Substitute some of the strawberries with raspberries or blackberries in equal amounts of crushed fruit, keeping the total fruit volume the same.
- Other fruits: Peaches, plums, and blackberries all make wonderful jam, but each fruit has different pectin and acid levels, so use a tested recipe for that specific fruit rather than swapping them one-for-one.
How to Use Homemade Jam
- Spread on toast, biscuits, or scones
- Stir into yogurt or oatmeal
- Swirl into cheesecake or ice cream
- Fill thumbprint cookies or pastries
- Layer in parfaits
- Use as a glaze for roasted chicken or pork (thin it with a little vinegar or broth)
- Serve with cheese and crackers
Storage
Unopened, sealed jars: Store in a cool, dark, dry place for up to 1 year for best quality.
Opened jars: Refrigerate and use within about 3 weeks.
Unsealed jars: Refrigerate and use within about 3 weeks, or reprocess within 24 hours using a new lid.
Frequently Asked Questions
Do I need pectin to make jam?
Not for fruit that has enough natural pectin and acid, such as strawberries combined with lemon juice. Without added pectin, the jam relies on cooking time to thicken, so you’ll cook it longer than with boxed pectin.
Can I use frozen strawberries?
Yes. Thaw them and use the fruit with its juice, measuring the crushed fruit exactly as the recipe states.
Do I have to use bottled lemon juice?
It’s recommended for consistent acidity. Fresh lemon juice varies in acidity from lemon to lemon.
Can I reduce the sugar?
In traditional jam recipes, not safely or successfully. Sugar helps with set and shelf life. For a lower-sugar jam, use a pectin made for reduced-sugar recipes and follow its instructions.
Can I can jam without a water-bath canner?
Use a large stockpot deep enough to cover the jars by 1 inch with a rack on the bottom. A dedicated canner makes it easier, but a stockpot works.
Why did my jar lid pop after I stored it?
A lid that pops or bulges after storage can signal spoilage. Discard the jar without tasting.
How long does homemade jam last?
Unopened and properly sealed jars are best within a year. Once opened, use within about 3 weeks.
Can I make this recipe in a small batch?
Yes. If you don’t want to can, make a small batch and keep it in the refrigerator for about 3 weeks or freeze it for longer storage. The canning process is only needed for shelf-stable jars.
Final Thoughts
Canning easy 3-ingredient jam is one of the most rewarding kitchen projects you can try. With just fruit, sugar, and lemon juice, you can fill your pantry with jars of homemade preserves that taste like peak-season fruit all year long. Follow the steps, respect the safety rules, and you’ll have beautiful, delicious jam to enjoy and share.
Have you ever canned your own jam? What’s your favorite fruit to preserve? Share your tips in the comments!